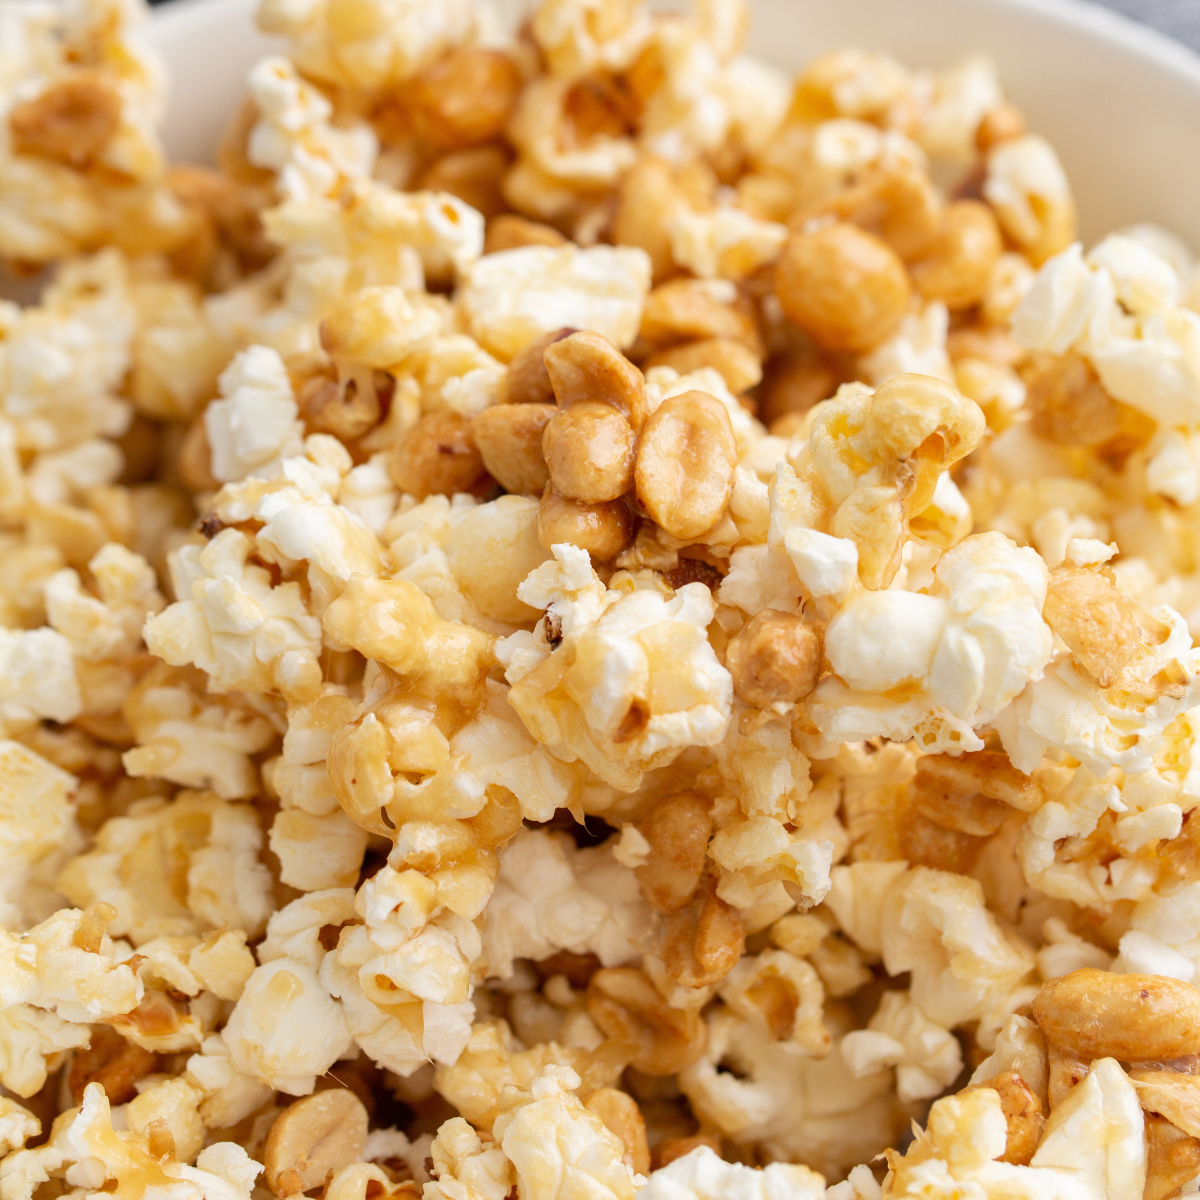
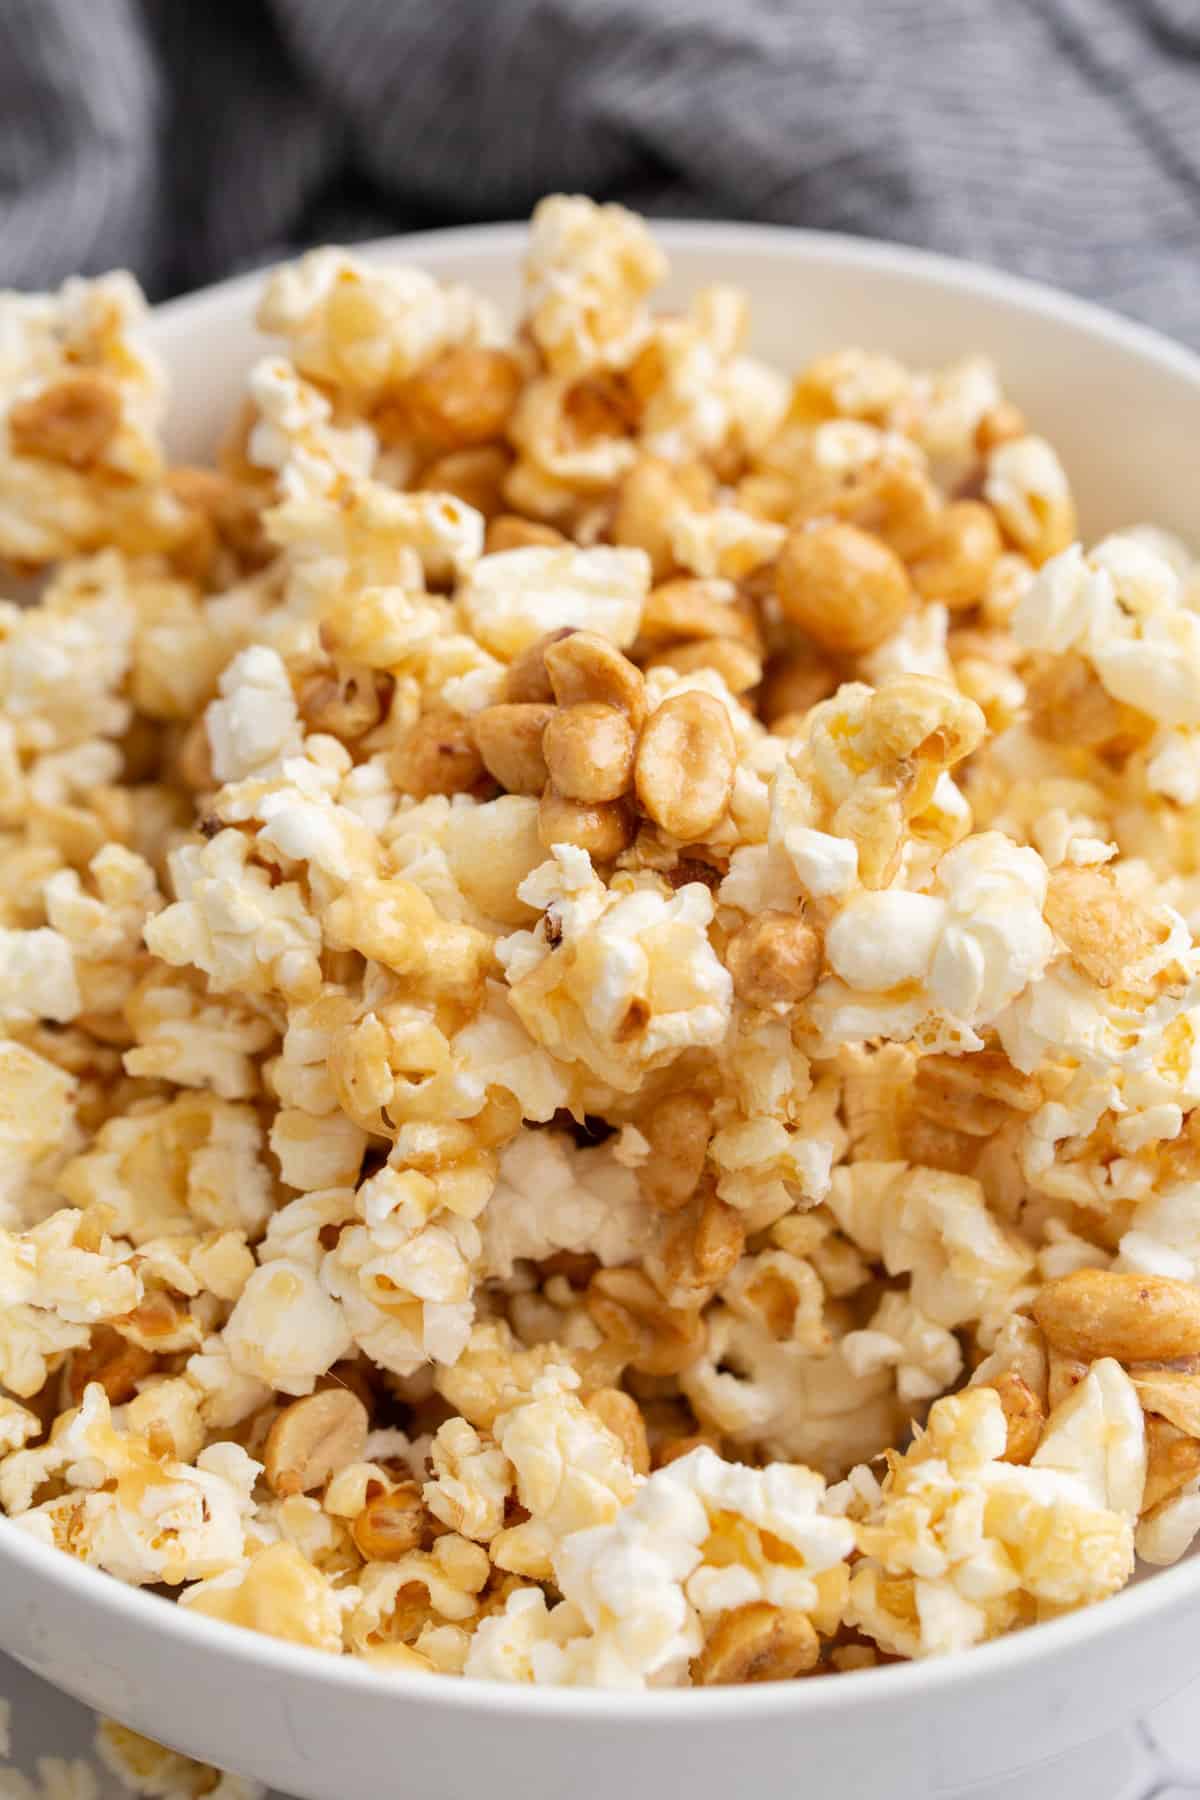
Air Fryer Cracker Jacks — Who doesn’t love Cracker Jacks? The sweet and salty combination is hard to resist, but it’s not always the healthiest snack. This recipe for Air Fryer Cracker Jacks gives you all of the flavors with a fraction of the calories. Plus, it’s so easy to make that you can enjoy this treat any time you want!
This recipe is easy, and my kids went crazy for it today; my project was to recreate a copycat version of the Air Fryer Cracker Jacks.
Making this was extremely easy, and it is fabulous. Sweet and crunchy simultaneously, the air fryer does a great job of making this caramel corn.
What Are Cracker Jacks?
If you’re like most people, the name Cracker Jacks probably brings to mind a delicious, caramel-coated popcorn snack. But what are Cracker Jacks, really? And where did they come from? Keep reading to learn more about this iconic American treat.
Last week, I made my first batch of Air Fryer Caramel Corn, and it was so easy, so when my son asked me if I could do Homemade Cracker Jacks. I went to the internet and figured out what the original was made from and thought; it seemed simple enough. So, I created this batch for their mid-day snack and wanted to share it with you all.
While I am not a fan of making popcorn in the air fryer, there are too many chances of the loose kernels getting caught in the heating element. But, I am a huge fan of using my air fryer to its total capacity, which means making homemade baked popcorn.
With only a few simple ingredients, you can make your own Cracker Jacks in the air fryer, both easy and delicious!
Remember the step-by-step directions below in the printable recipe card, at the bottom of the page.
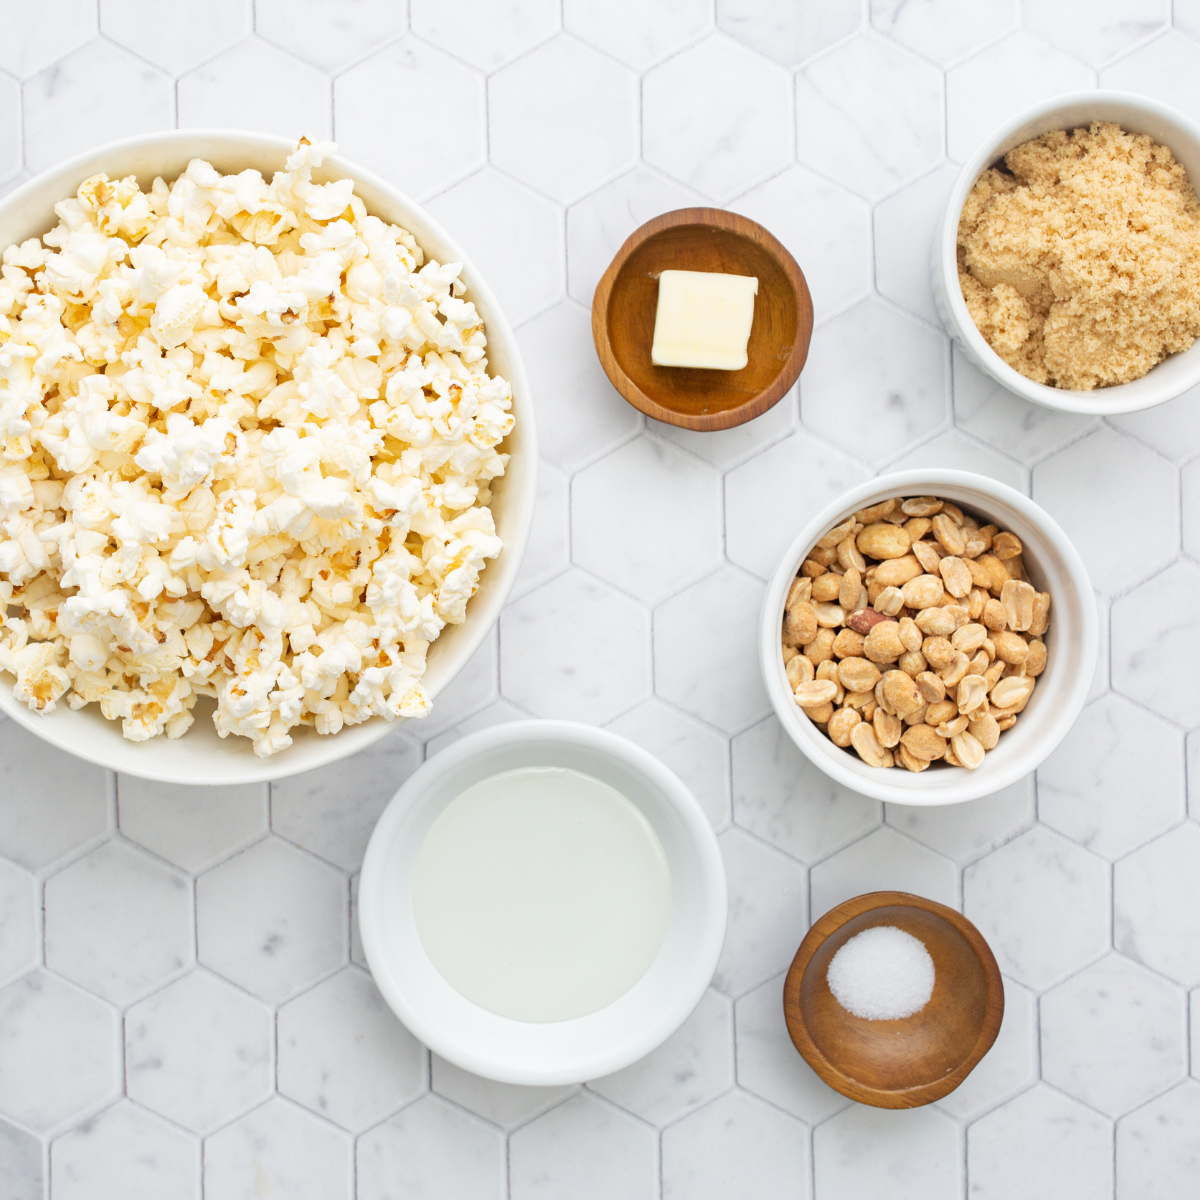
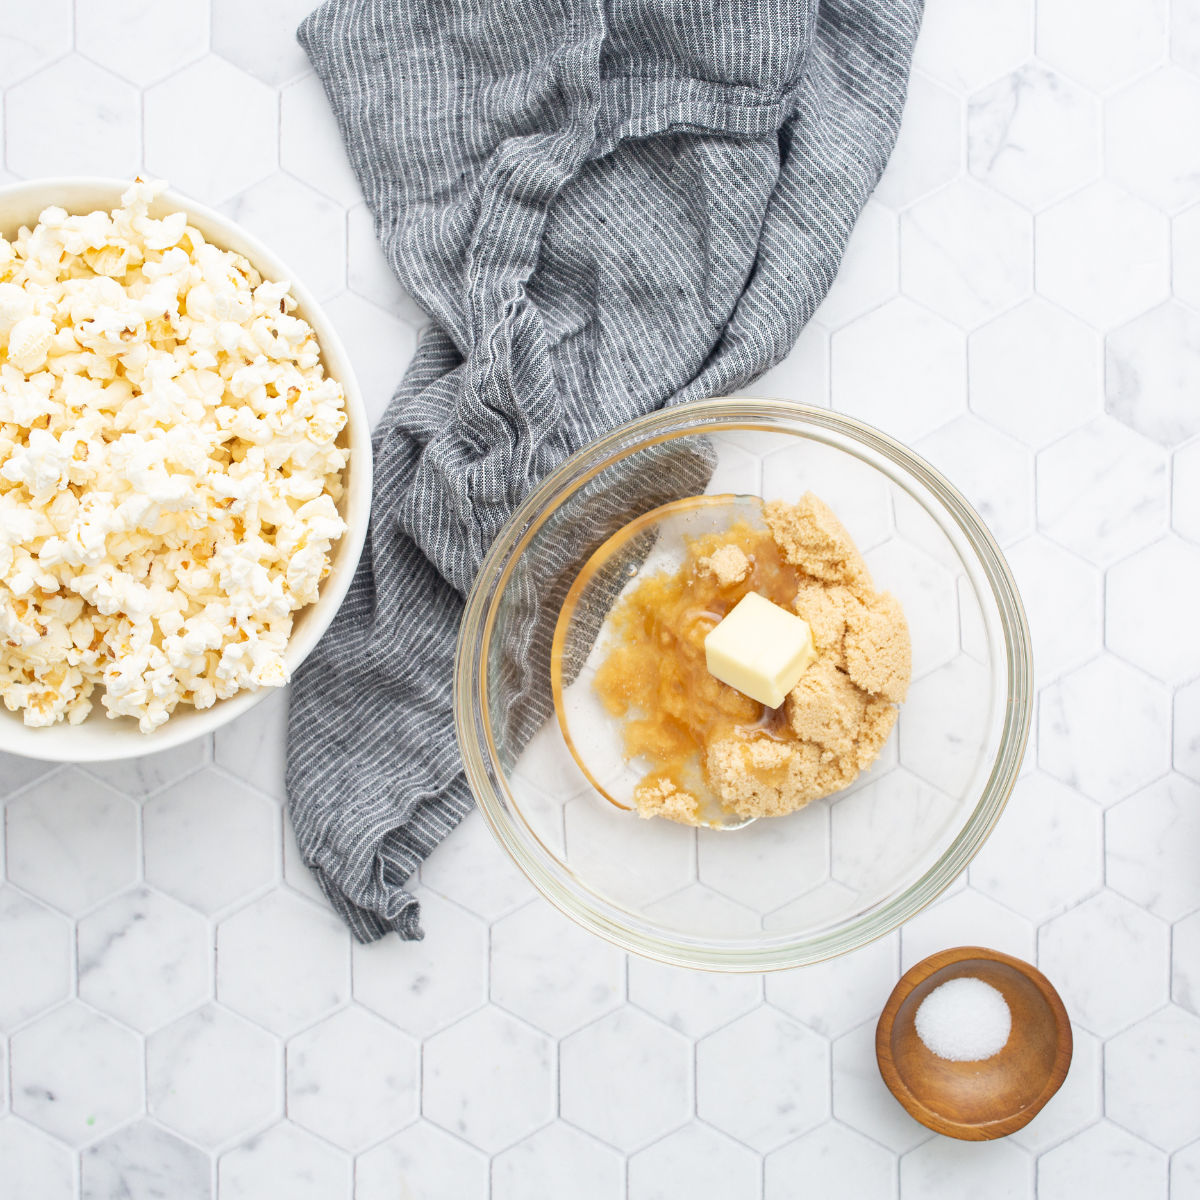
4 Cups of Popped Popcorn
1/2 cup Spanish Peanuts
1 cup dark brown sugar
1/3 cup light corn syrup
One tablespoon butter
One teaspoon salt
How To Make Cracker Jacks In Your Air Fryer
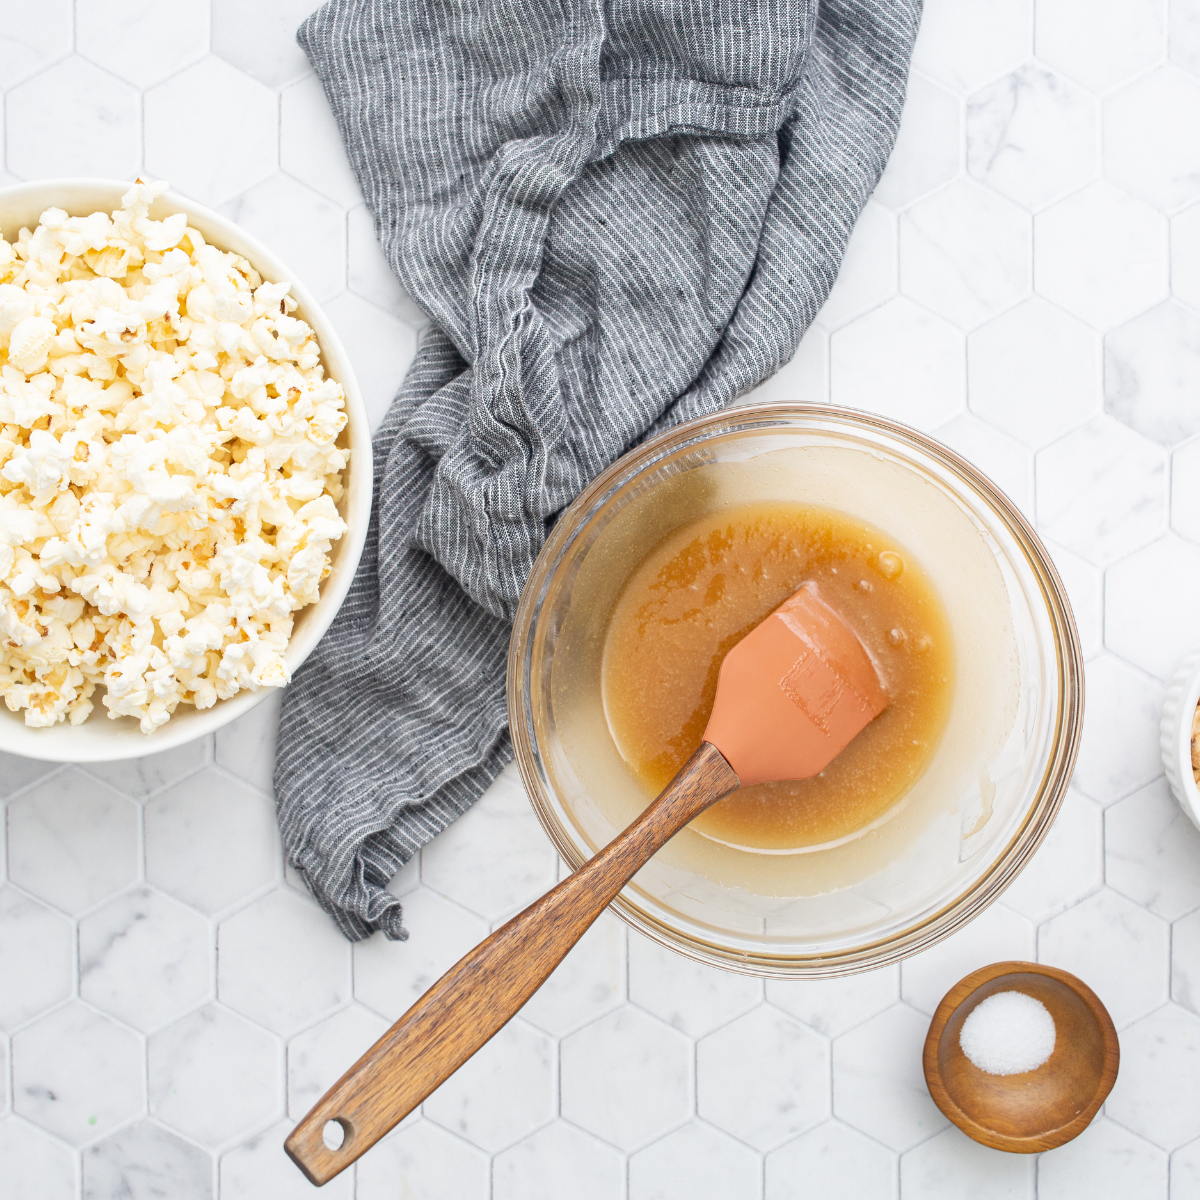
Add brown sugar, corn syrup, and butter to a microwave-safe bowl. Set the timer for 30-second intervals, and stir in between until a slight simmer happens. (mine took 1:30 minutes)
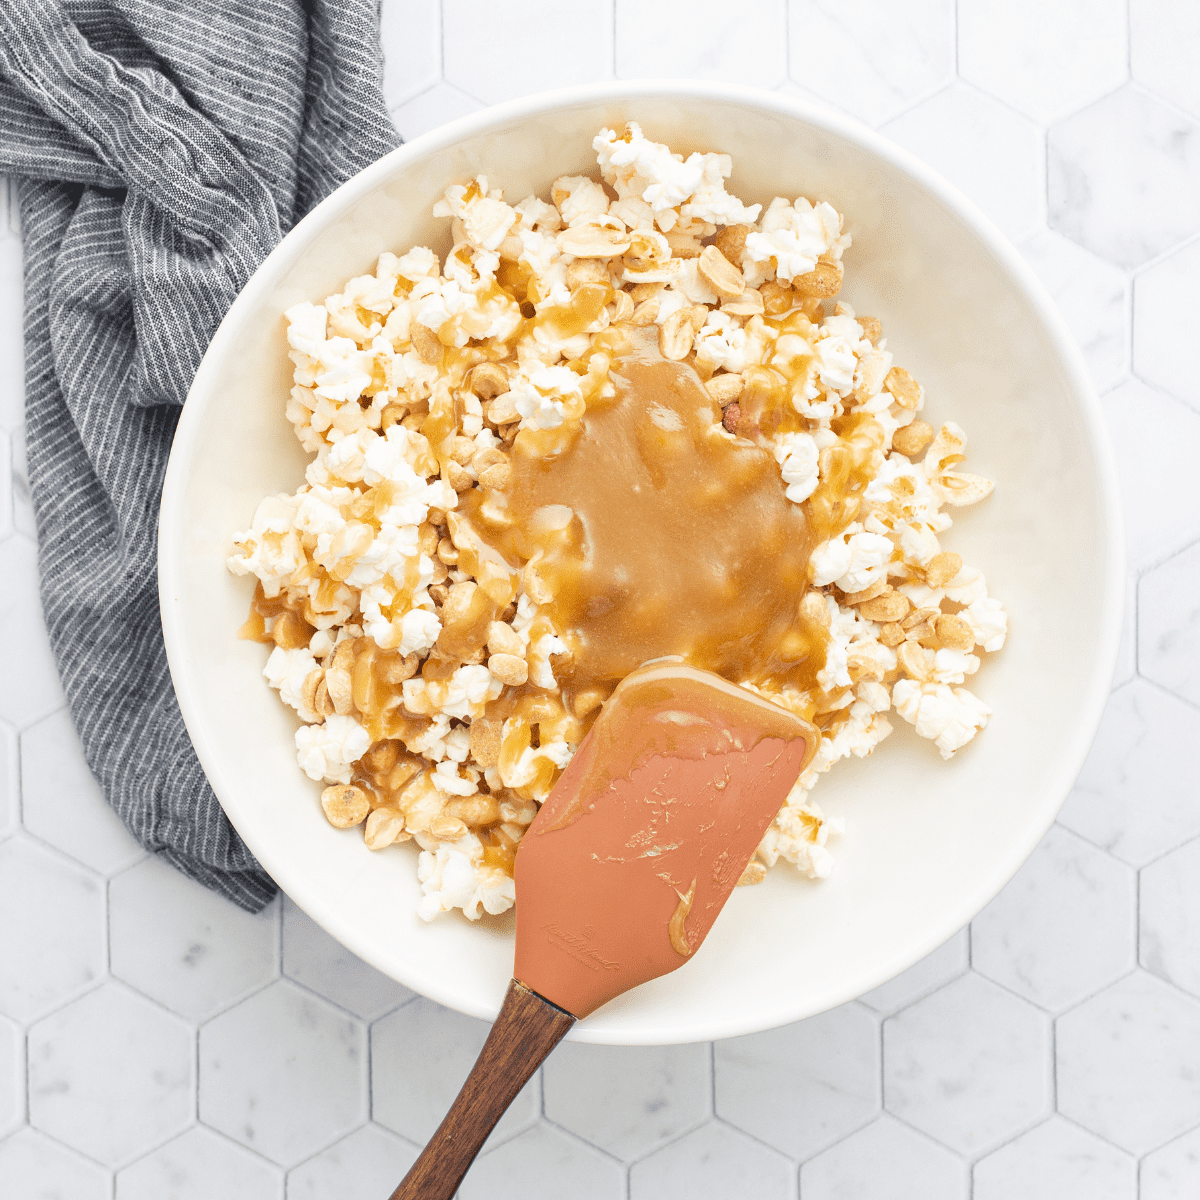
Then mix with the popped popcorn, add the peanuts, and ensure that the popcorn and peanuts are covered with the syrup.
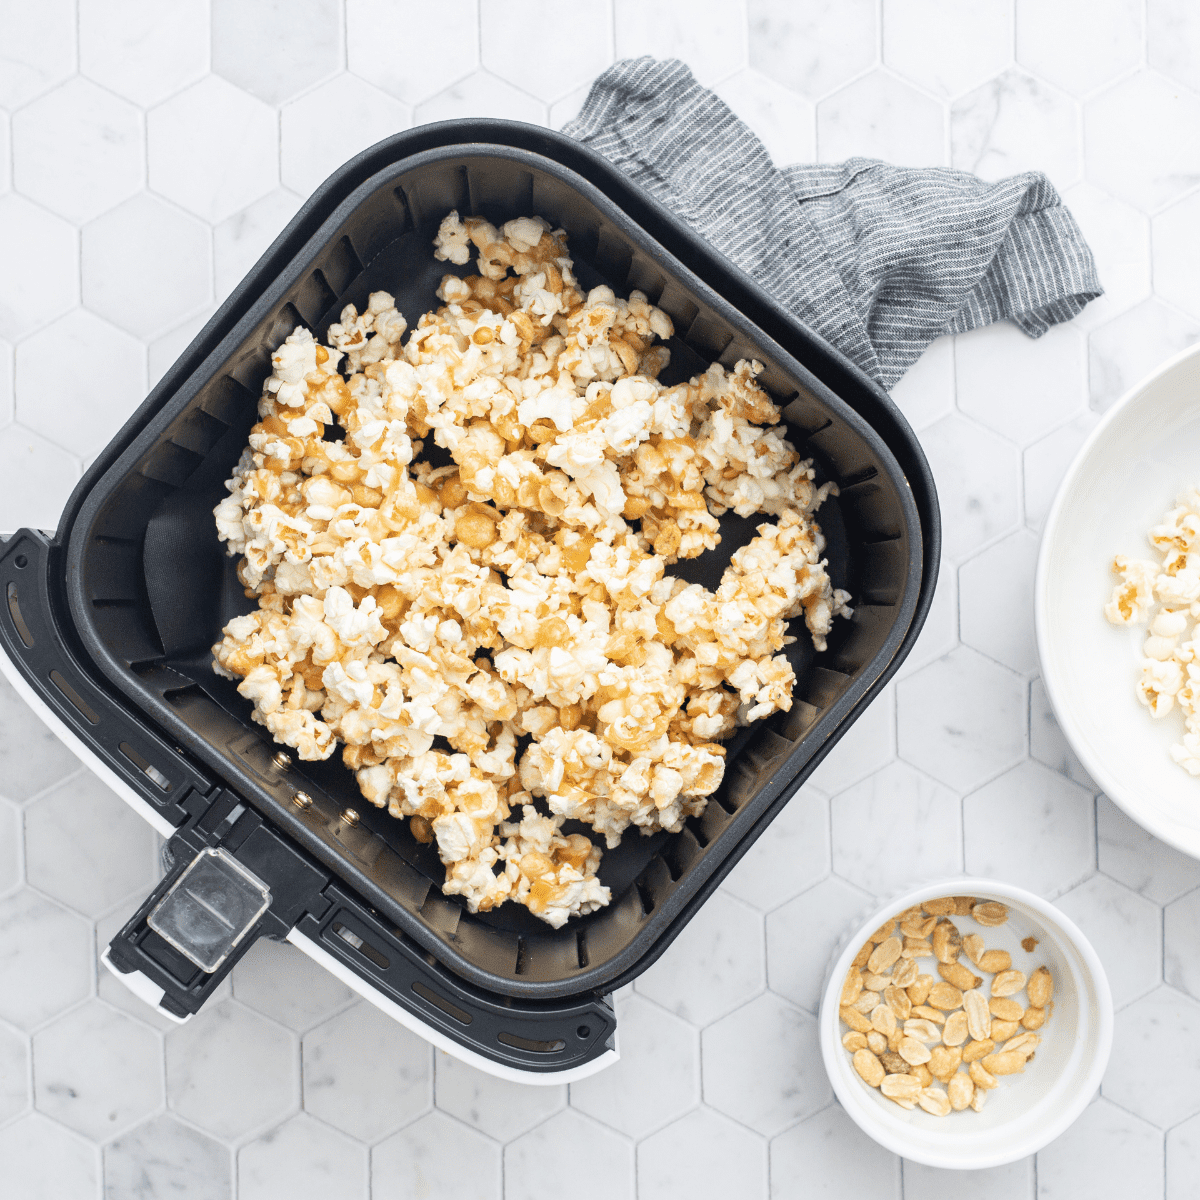
Spread on an air fryer safe tray or in your basket, and line it with aluminum foil. Set the temperature to 275 degrees F for about 6-8 minutes. If you have an air fryer basket model, spread the popcorn on a parchment-lined basket.
Let cool, as it will harden as it cools—season with salt.
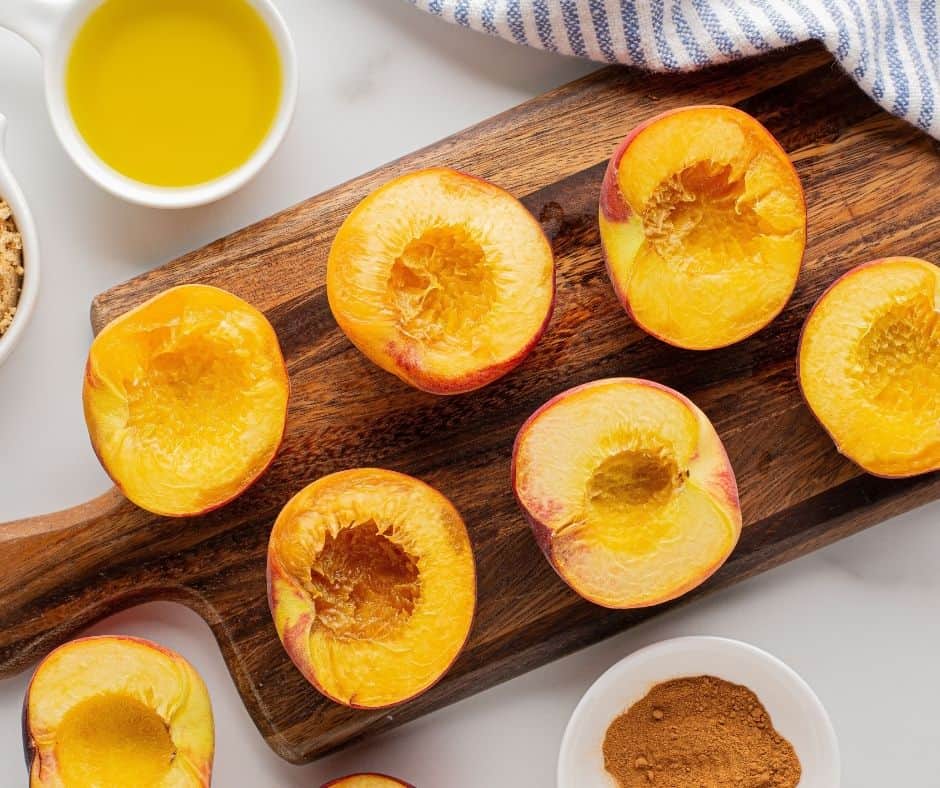
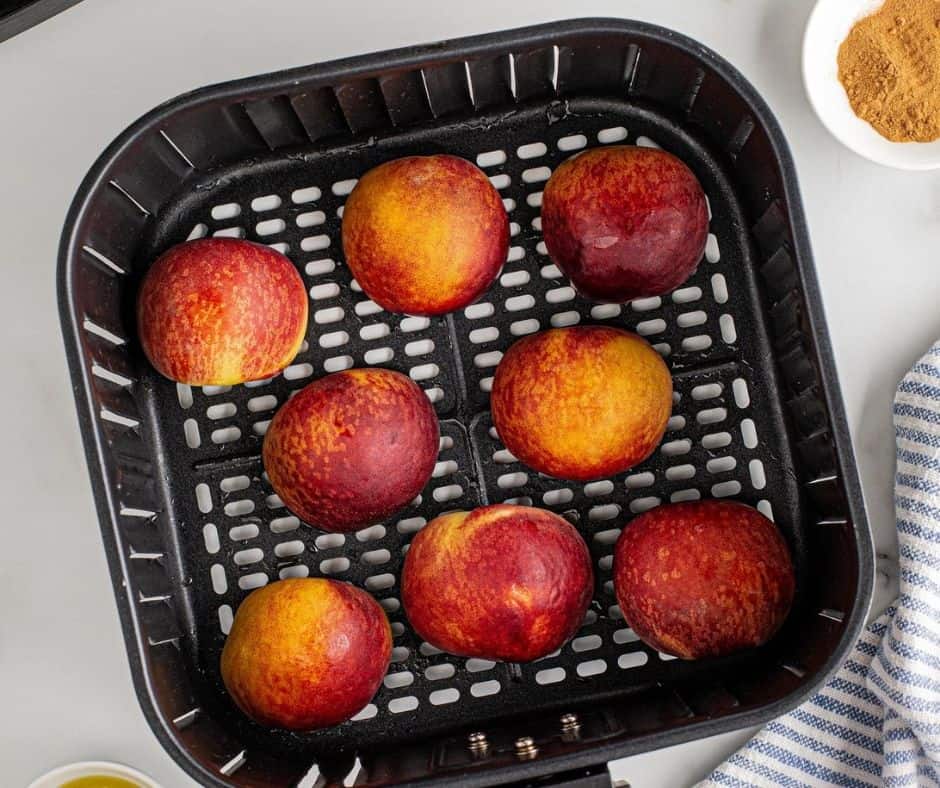
Preheat the air fryer to 350 degrees F, air fryer setting. In a small bowl, combine butter, sugar, and cinnamon. Set aside. With a sharp knife, halve and pit each peach.
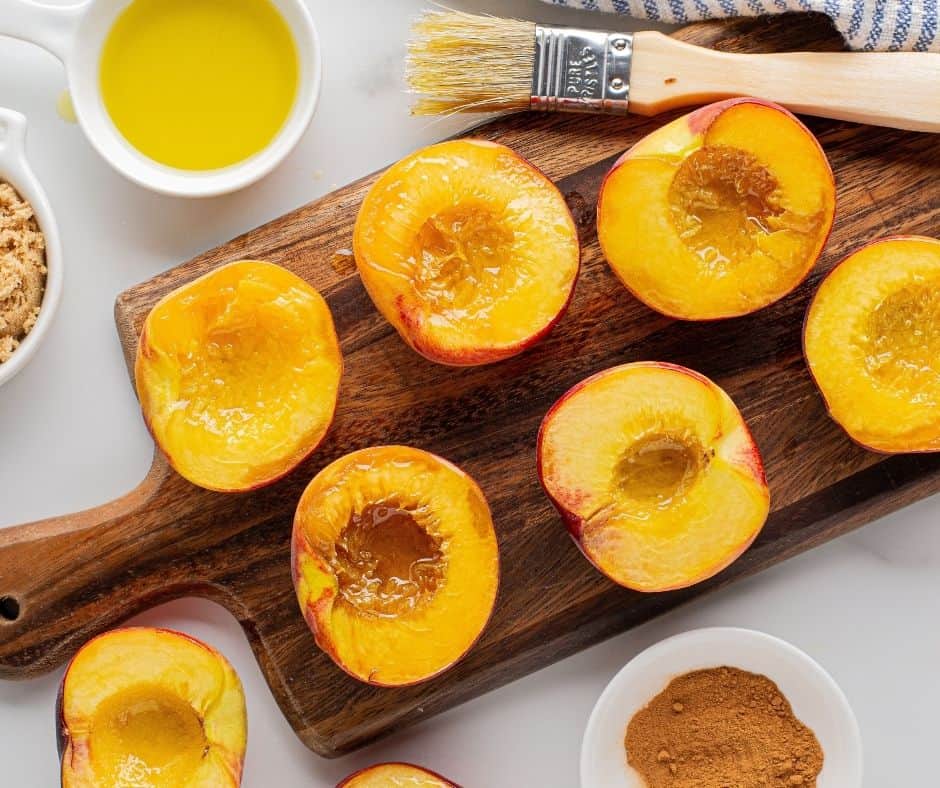
Brush cut side with olive oil.
Place the peaches face down in the air fryer basket—Cook at 350 degrees F, air fryer setting, for 8 to 10 minutes.
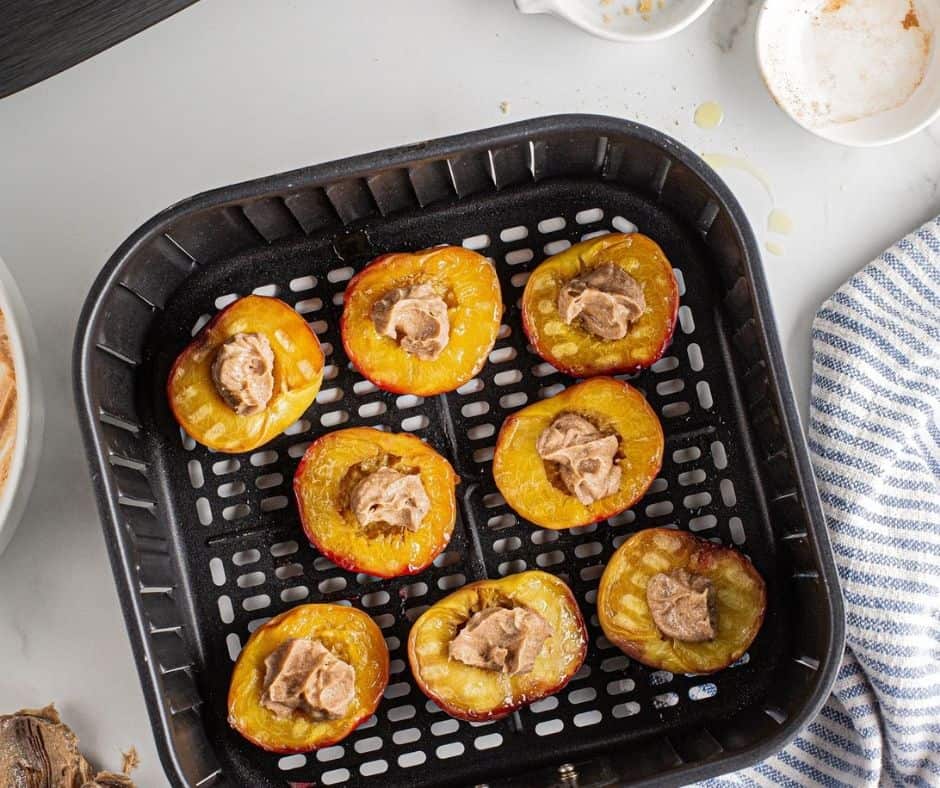
Carefully open the air fryer and flip peaches using a large spoon. Place a spoonful of the butter mixture in each peach. Cook an additional 3-5 minutes or until they begin to caramelize on top.
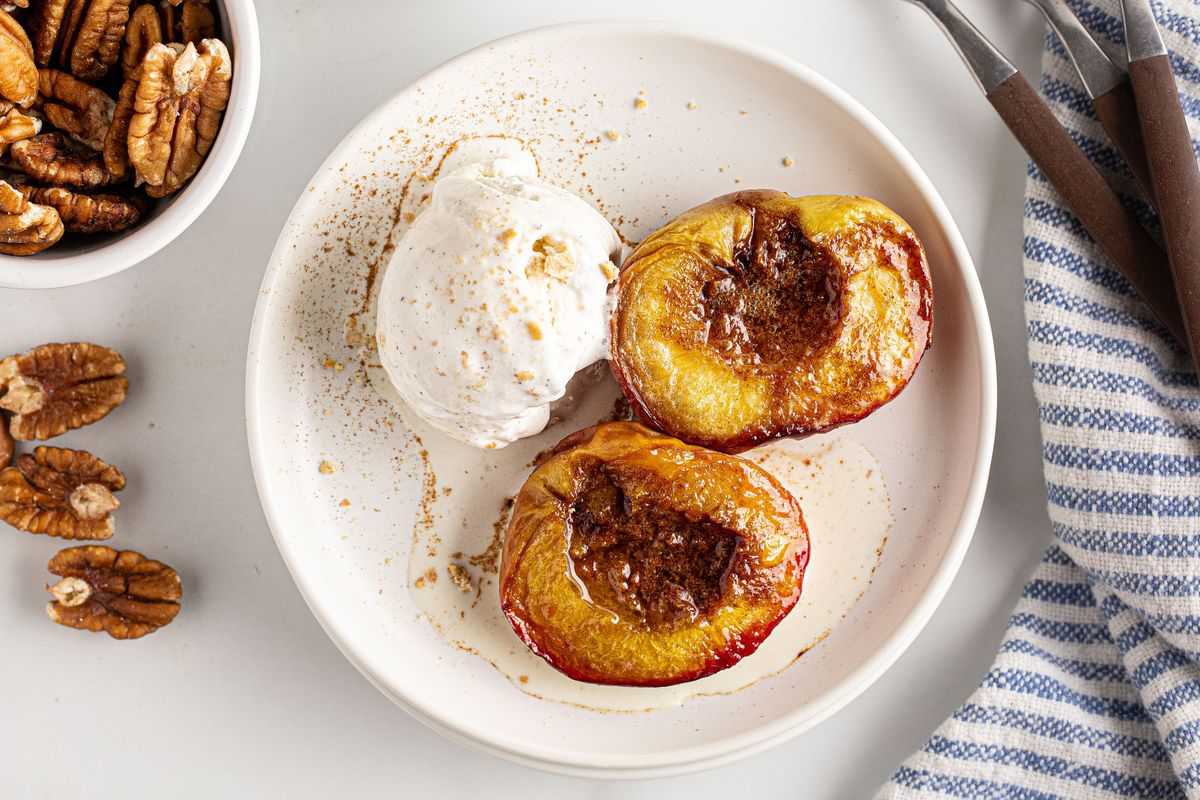
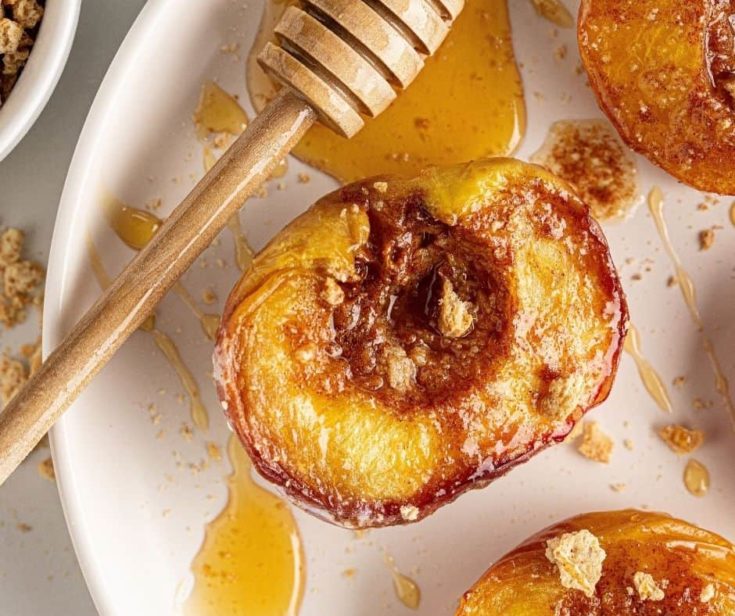
What do Grilled Peaches taste like?
If you have ever had a piece of peach pie, with the gooey pie filling filled with spices, it reminds me of that.
It is a rich, sweet and absolutely delicious dessert.
For best results, you really want a firm peach, one that is not too soft, otherwise it tends to get mushy.
So, for best results use a firm peach. If you use a ripe peach, you will notice that it will tend to smoke more, since those peaches tend to release more sugar. So, look for a peach that is on the cusp of being ripe, but not already ripe.
How do I store leftovers?
If you happen to have leftovers, they can be stored in an airtight container and reheated. Consume within 3 days.
These will not do well frozen, so do not try to freeze them. They will thaw and be mushy, and will be inedible.
Can I substitute the peaches?
Yes! You can follow this recipe but use nectarines, plums, apricots, or apples!
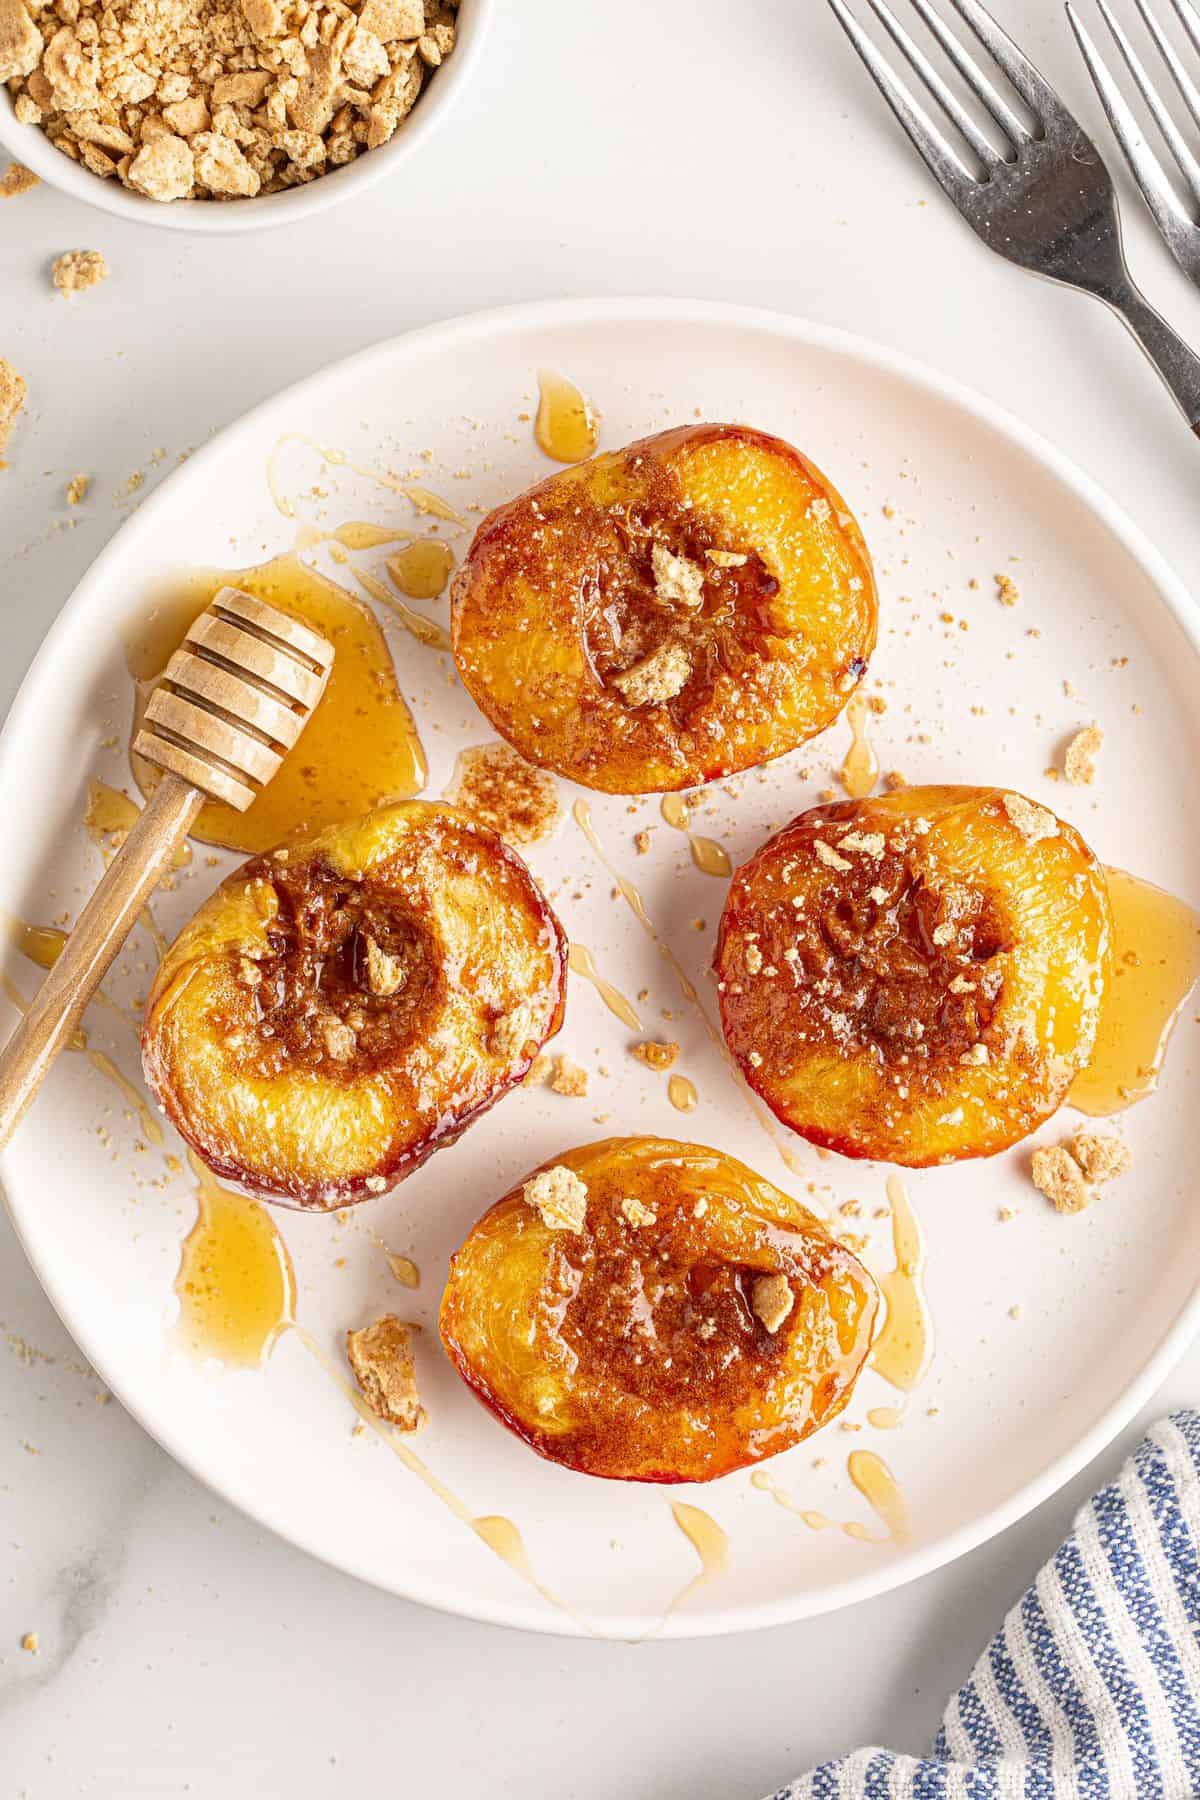
Juicy, sweet peaches get a major upgrade with the air fryer! This simple warm-weather dessert will hit the spot!
PREP TIME5 minutes
COOK TIME10 minutes
TOTAL TIME15 minutes
Ingredients
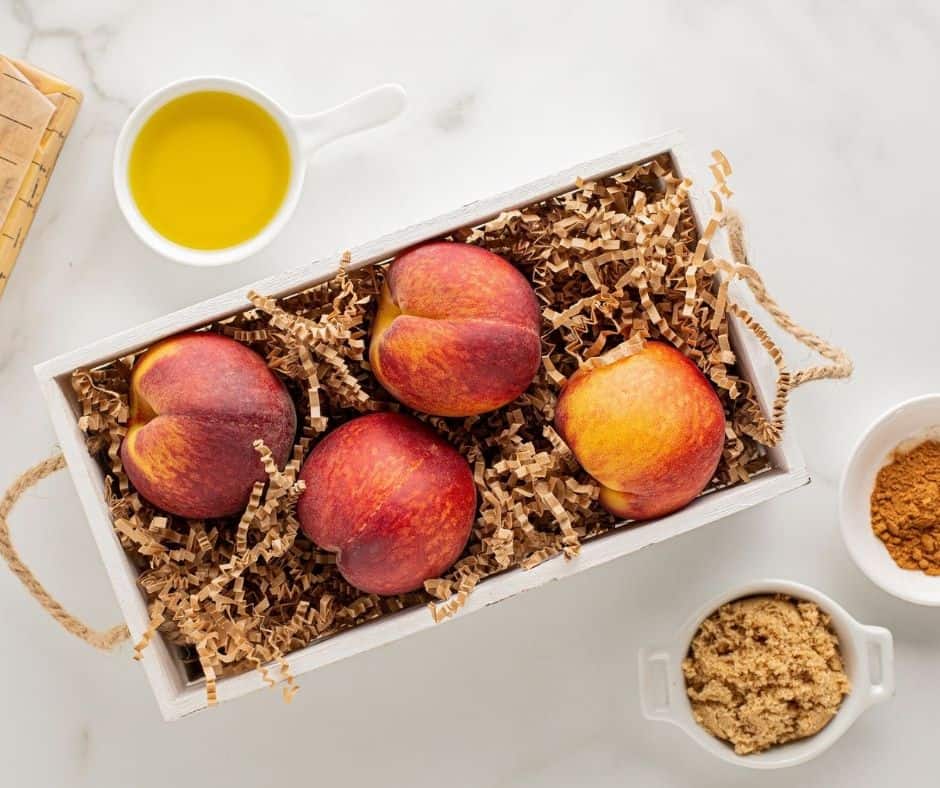
4 yellow peaches, firm
2 Tablespoons olive oil
½ cup unsalted butter, room temperature
2 Tablespoons brown sugar
1 teaspoon ground cinnamon
Optional: vanilla ice cream, a drizzle of honey, graham cracker crumbs, pecans, and fresh mint leaves
Instructions
Preheat air fryer to 350 degrees F, air fryer setting.
In a small bowl, combine butter, sugar, and cinnamon. Set aside.
With a sharp knife, halve and pit each peach.
Brush cut side with olive oil and place face down in air fryer basket.
Cook at 350F for 10 minutes.
Carefully open the air fryer and flip peaches using a large spoon.
Place a spoonful of the butter mixture in each peach.
Cook an additional 3-5 minutes or until they begin to caramelize on top.
▢Finely chopped chives or parsley , garnish (optional)
Instructions
Preheat oven to 180°C / 350°F.
CRUMBING:
Toast breadcrumbs: Spread breadcrumbs on tray. Spray with oil, bake 4 minutes until golden. Transfer toasted breadcrumbs into bowl, add remaining Crumb ingredients and mix.
Increase oven to 220°C / 425°F (fan 200°C). Spray used tray with oil.
Batter: Mix Batter ingredients in a separate bowl.
Cut the fish into strips 1.5 x 11 cm / 3/5 x 4.5″ (they shink 30% in length).
Place fish in Batter, gently mix with rubber spatula to coat. Do not leave sitting around (will become watery), coat immediately.
Breading: Pick up fish with tongs, place in breadcrumbs. Spoon over crumb, use fingers to press to adhere.
Baking: Transfer to baking tray. Spray with oil, bake 13 minutes or until crispy on the outside.
Serve immediately with lemon wedges, Tartare Sauce or other Sauce of choice – see here for recipes, any of these great for fish fingers! Also Note 3 for few quick sauce options.
Recipe Notes:
1. Fish – I’ve used Ling – the long shape makes it ideal for cutting into fish finger batons. Virtually any fish fillets will work here except lean fish that dries out easily, such as swordfish, kingfish, bonito and tuna.
Other popular fish that will work well include: tilapia, ling, cod, basa, catfish, barramundi, bream, snapper, John dory / Silver dory.
Frozen fish works fine – thaw completely, pat dry then use per recipe. Any frozen white fish from grocery store should be fine – they always sell great all rounders.
2. Panko breadcrumbs – larger pieces than normal breadcrumbs which creates a really nice extra crunchy coating. Pretty common nowadays, found in the Asian section of supermarkets here in Australia. Can sub with normal breadcrumbs, but measure using cups not weight.
3. Sauces:
Classic – Tartare Sauce which you will find in this recipe along with Thousand Island, Marie Rose and the RecipeTin Family Favourite seafood dipping sauce. All these go equally well with Fish Fingers.
Quick sauces:
Quick creamy lemon – mix together mayo, sour cream or yogurt (or a combo of these) with a squeeze of lemon juice;
Pink sauce – Ketchup and/or Sriracha with mayo, sour cream or yogurt (or any combo of these);
Ketchup and/or mustard!
The breadcrumb coating is nicely flavoured, so you don’t need a ton of flavour in the sauce. You just want something wet. Even a squeeze of fresh lemon juice would suffice here!
4. Storage – either bake immediately once assembled OR freeze immediately raw then bake from frozen, 15 min. Cooked fish fingers don’t keep that well because crumb goes soggy and because they are so small, they don’t reheat well in the oven (inside tends to dry out).
Active dried yeast. Unlike cake doughnuts that use only baking powder and/or baking soda for leavening, these are proper yeast doughnuts. The yeast contributes to their wonderful flavour and makes them wonderfully pillowy-soft. If using active dried yeast, you’ll need to first activate it in a bit of warm milk – this also tells you whether or not your yeast is active. If you don’t see any bubbles or frothing appearing on top of the milk-yeast mixture after about 5-10 minutes, then your yeast isn’t active and you need to use a new batch of yeast. (If you want to use instant yeast instead, check out the substitutions section and the recipe below.)
Sugar. You can use either caster/superfine or granulated sugar for this recipe. The sugar plays two roles: firstly, it makes the doughnuts slightly sweet and, secondly, it gives the yeast something to feed on, which in turn makes the yeast more active. Note that the doughnuts themselves aren’t super sweet. Because any fillings and toppings (jam and cinnamon sugar in this case) are plenty sweet already, the doughnuts as a whole work best if the dough isn’t overly sweet.
Warm whole milk. You’ll use this milk to activate the yeast, that’s why it’s important that it’s either warm or lukewarm.
Psyllium husk. This acts as a gluten substitute and it’s what gives the final, fried doughnuts their pillowy-soft and slightly chewy texture. Without psyllium husk, you won’t get a dough that you can actually handle and shape, and the doughnuts won’t proof properly. You can’t substitute the psyllium husk with another ingredient. This recipe uses WHOLE psyllium husk, but you can also use psyllium husk powder – if you use the powder form, use only 85% of the amount listed in the recipe below. You can read more about the role of psyllium husk in gluten free baking here!
Cold water. Unlike milk, you want to use COLD water (it doesn’t need to be chilled from the fridge, just cold from the tap is OK). That’s because the dough, once made, will go straight into the fridge to chill. It will chill down faster and with minimal proofing if you use cold water.
Tapioca starch. (For substitution options, check out the substitutions section or the recipe below.)
Millet flour. (For substitution options, check out the substitutions section or the recipe below.)
Sorghum flour. (For substitution options, check out the substitutions section or the recipe below.)
Xanthan gum. This also acts as a gluten replacement. In enriched dough recipes, such as cinnamon rolls or doughnuts, I like to use a mixture of psyllium husk and xanthan gum (unlike with artisan loaves, where you can use only psyllium husk). Using the mixture of both binders gives a softer, more delicate crumb. In comparison, using psyllium husk only would give a more robust, hearty, chewier crumb. You can read more about the role of xanthan gum in gluten free baking here!
Salt. It’s important to add salt to any bread recipe, as it brings out all the flavours.
Baking powder. Yes, we’re making *yeasted* doughnuts – but we’ll still be adding baking powder. I’ll explain more about this below, but in short: baking powder makes these gluten free doughnuts much softer and fluffier, and therefore closer in texture to “regular” doughnuts made from wheat flour.
Cold egg. Much like with the cold water, using a cold egg will speed up the chilling step and will therefore save time.
Softened unsalted butter. This gives richness to the doughnuts. However, compared to “regular” doughnuts made with wheat flour, we’ll be using a smaller amount of butter. Using too much butter can weigh the gluten free doughnuts down too much and can make them too dense.
In addition to the ingredients above that are required to make the dough for the gluten free doughnuts, you’ll also need:
Oil for frying (I like to use sunflower oil, but if you have another favourite oil for frying you can use that – just make sure that it’s neutral in flavour and that it has a high smoking point).
Cinnamon sugar for rolling the doughnuts.
Jam of choice for filling (any jam will work well, so long as there aren’t any large pieces of fruit in it – I filled a few doughnuts with strawberry jam and a few with apricot jam).
SIDE NOTE: BAKING POWDER IN YEAST DOUGHNUTS???
First of all, let’s get one thing out of the way: we are making yeastdoughnuts here. We’re not making cake doughnuts.
And yes, yeast doughnuts typically don’t contain any baking powder – they rely entirely on yeast for their fluffy, soft texture and open crumb.
However, I’ve tested this recipe both with and without the added baking powder and there’s a marked difference between the two: the gluten free doughnuts made WITH baking powder are noticeably fluffier and softer compared to those made without baking powder. They puff up more during frying, so that they end up larger (greater in volume) than those without baking powder.
So, even though adding baking powder to yeast doughnuts isn’t “traditional” or “typical”, it does help them to achieve a better, more delicious texture. And even though some might consider this “cheating” – in the end, at least to me, the final result is the most important part. So, if you want your gluten free doughnuts to be wonderfully fluffy and soft: trust me and add the baking powder.
The recipe uses 2 teaspoons baking powder per one batch of 8 doughnuts. I’ve also tested it with just one teaspoon of baking powder, and I prefer the version with more baking powder. However, both versions are incredibly soft and delicious: so, while I recommend using 2 teaspoons, you could also use just one teaspoon.
MAKING THE GLUTEN FREE ENRICHED DOUGH
There’s nothing complicated or difficult about making the dough for these doughnuts: just activate the yeast and make the psyllium gel (by mixing the psyllium husk with water), and then combine all the other ingredients except the butter in the bowl of a stand mixer fitted with a dough hook (or just a large bowl if making them by hand) and knead everything together into a smooth, sticky, soft dough.
Add the butter and knead until it’s fully incorporated. The final dough will be fairly soft and sticky – that’s okay! The next chilling step will make the dough much less sticky and easier to handle.
CHILLING THE DOUGH
Transfer the dough into a lightly oiled bowl, cover the bowl with cling film (plastic wrap) and chill in the fridge for at least 1-2 hours.
Chilling the dough is pretty crucial, as it cools down and sets the butter in the dough, which in turn makes the dough firmer and easier to handle and shape into the individual doughnuts. It also gives the gluten free flours time to properly hydrate (that is, to absorb the moisture in the dough), which also makes the dough less sticky.
You could even chill the dough overnight, and then shape, proof and fry the doughnuts the following day!
SHAPING THE DOUGHNUTS
Although most doughnut recipes will ask you to cut out the individual doughnuts with a large round cookie cutter, I’ve found that I get the best results by shaping the doughnuts into balls and then flattening them slightly (almost like making burger buns that you pat down slightly to make them flatter).
By shaping the doughnuts by hand into flattened balls, the final fried doughnuts have a nicer, rounder shape. In comparison, doughnuts that have been cut out with a cookie cutter are flatter in shape (though they still puff up nicely during proofing and frying), with a less rounded top.
That said, you can also cut out the doughnuts if you find it easier and more convenient. The doughnuts will still be fluffy and delicious, but they won’t have the same rounded shape. If you go down the cut-out doughnut route: roll out the dough to a thickness of about 1 inch (2.5cm), and then use a round cookie cutter about 3 inches (7.5cm) in diameter to cut them out (dip the cookie cutter in a bit of flour to prevent sticking). Re-roll any scraps to make more doughnuts.
To shape the doughnuts into flattened balls, first divide the chilled dough into 8 equal pieces (each piece should weigh about 88g). I recommend using a digital food scale to get all pieces the same weight, as that will ensure that they all cook at the same rate and will therefore prevent any doughnuts from being undercooked.
Then, shape the doughnuts into balls, as you would dinner rolls or burger buns, and finally flatten them. Make sure to work on a lightly floured surface (I usually use millet flour for flouring). Here’s the step by step process of how to do it:
First, flatten one piece of dough.
Take the corners and bring them in towards the middle,
until you get something resembling a pouch. Pinch the ends together.
Turn the piece of dough upside down, so that the seams face downwards.
Form your hand into a “claw” over the piece of dough and move it in a circular motion on the surface. This will essentially rotate the dough in place, which will help to form a perfectly round ball and also seal the seams together.
Finally, gently flatten the ball until it’s about 1-1 ¼ inch (2.5-3cm) thick at the centre point (take into account that it will have rounded edges and it will therefore be thinner towards the edge), and about 3 inches (7.5cm) in diameter. Repeat with the rest of the dough pieces.
PROOFING UNTIL ABOUT DOUBLED IN VOLUME
I like to proof the doughnuts by placing them on individual squares of parchment/baking paper on a large baking sheet. These squares of parchment paper will make placing the proofed doughnuts into the frying oil much easier and pretty much stress-free.
You’ll need to proof the doughnuts in a warm place for about 1 ½ hours or until about doubled in volume. Lightly cover them with a sheet of cling film to prevent them from drying out. If your kitchen is on the cold side, you can proof them in a lukewarm oven (the ideal proofing temperature is around 79ºF/26ºC).
FRYING UNTIL GOLDEN BROWN
After the doughnuts have been proofing for about 1 hour, you can start setting up the “frying station”. For this, you can use a large heavy-duty pot or deep pan, a large cast iron pot or a deep fryer if you have one. If you’re using a pot or a deep pan, make sure that you fill it with enough oil so that the oil is at least 2 inches (5cm) deep.
The best oil for frying is one that’s neutral in flavour and has a high smoking point. I prefer to use sunflower oil, but you can use your favourite frying oil instead (so long as it fulfils those requirements).
Heat the oil to 320-330ºF (160-165ºC). In this temperature range, the doughnuts will get beautifully golden brown by the time they’re fully cooked through and they’ll absorb only a very minimal amount of oil (pretty much negligible). A lower oil temperature can leave them pale and can also result in them absorbing some of the oil, which can make them greasy. A higher oil temperature will cause them to brown too much and too quickly.
Make sure that the oil is heated to 320-330ºF (160-165ºC) before you start frying the doughnuts, and make sure to maintain this temperature throughout the frying process (you might need to adjust your stove’s heat to maintain the oil temperature at the correct temperature range).
Carefully place the doughnuts into the hot oil. Use the squares of parchment paper to help you lower the doughnuts into the oil. The number of doughnuts that you’ll be able to fry at the same time will depend on the size of your pot, pan or fryer. Don’t crowd them together too much. I used a large, deep pan so I was able to fry 4 doughnuts at the same time.
After 10-15 seconds, you can use kitchen togs to remove the squares of parchment paper out of the oil.
Fry the doughnuts on this first side for about 2 ½ minutes or until deep golden brown, then flip them over.
Fry them on the other side for a further 2 ½ minutes.
Then, use a slotted spoon to remove the doughnuts out of the oil and onto a large plate or wire rack lined with paper towels. Make sure to drain your doughnuts properly before placing them onto the paper towels. I like to cover them with a layer of paper towels on top as well, just to absorb any oil on top of the doughnuts.
Note that the doughnuts will initially have a crisp crust immediately out of the hot oil, but the crust will soften after a minute or two.
Assembling gluten free jelly doughnuts
There are two parts to assembling these doughnuts: first, rolling them in cinnamon sugar and, secondly, filling them with jam.
It’s best to roll the doughnuts in the cinnamon sugar while they’re still hot or at least very warm, as that will help it to adhere to the doughnuts. For the cinnamon sugar, I like to use superfine/caster sugar (again, it simply gives a more even coating on the doughnuts), but you can also use granulated sugar instead. (Also, if you prefer your doughnuts dusted with powdered/icing sugar, you can do that too! In that case, dust them with sugar after you’ve filled them.)
Then, it’s time to fill them. It’s best to fill the doughnuts when they’re either lukewarm or cooled completely to room temperature. First, make a hole in the doughnuts – I like to use a long thin knife for this, but I’ve seen people use everything from scissors to skewers. Making a hole will make filling the doughnuts much easier.
Then, transfer your jam of choice to a piping bag fitted with a nozzle. Now, ideally, use a Bismark piping tipfor filling the doughnuts – because it has a long tip, it’s perfectly suited to filling the very centre of the doughnuts (instead of having all the jam in just one half, which I find really annoying). If you don’t have a Bismark piping tip, a round piping nozzle will work in a pinch.
Fill the doughnuts until the jam starts coming out of the hole – that tells you that the doughnuts are filled to their maximum capacity. If you want to get precise about it, I fit about 35-40g of jam per doughnut.
And that’s it!! All that’s left is to tuck in and enjoy.
What’s the best temperature for frying gluten free doughnuts?
The best oil temperature for gluten free doughnuts is 320-330ºF (160-165ºC). In this temperature range, the doughnuts will get beautifully golden brown by the time they’re fully cooked through and they’ll absorb only a very minimal amount of oil (that is, oil absorption is pretty much negligible).
A lower oil temperature can leave them pale and can also result in them absorbing some of the oil, which can make them greasy. A higher oil temperature will cause them to brown too much and too quickly.
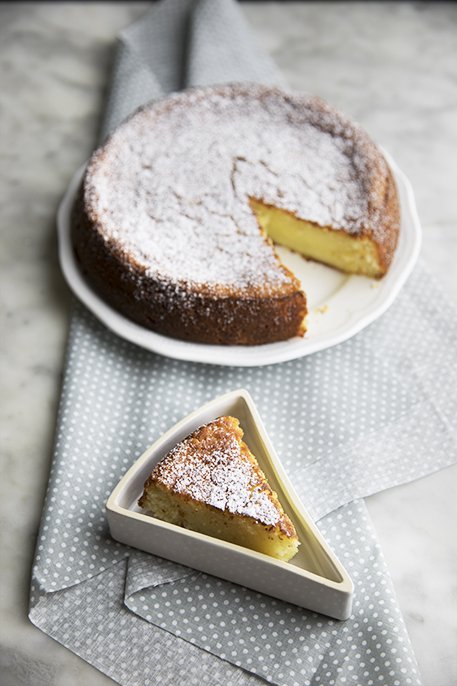
Per otto porzioni ci vogliono: – quattro uova; – 150 grammi di mandorle sbucciate; – 50 grammi di stevia oppure un etto di normale zucchero semolato; – la scorza e il succo di un limone, possibilmente biologico; – sale q.b.
Si comincia montando a neve ferma gli albumi, con l’aggiunta di un pizzico di sale. Le chiare saranno montate a neve quando sollevando le fruste rimangono attaccate.
Quanto ai rossi, quelli si lavorano in una boule a parte insieme alla stevia (o allo zucchero normale, a scelta).
Frattanto con un robot da cucina avrete macinato le mandorle sgusciate. Dovranno acquistare una consistenza farinosa. Attenti a non macinare troppo, sennò si ottiene del burro.
Dopodiché questa farina di mandorle andrà aggiunta ai tuorli insieme alla scorza di limone grattugiata e al succo di limone: amalgamare bene.
L’ultimo passo è aggiungere gli albumi montati a neve: un po’ alla volta e mescolando con una spatola (o un cucchiaio) dal basso verso l’alto, che non si smontino.
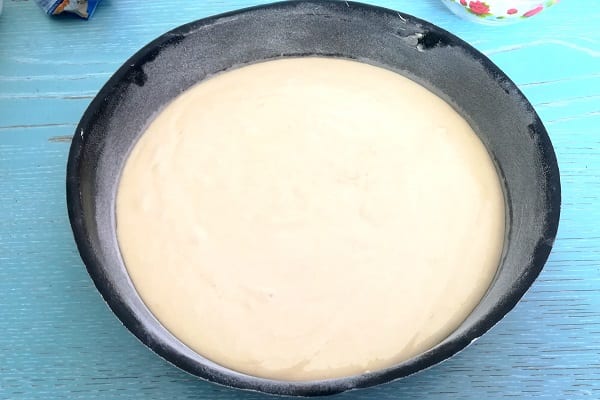
Adesso si preriscalda il forno a 180 gradi, quindi si prende uno stampo per dolci, si unge con del burro e poi ci si versa il composto di cui sopra.
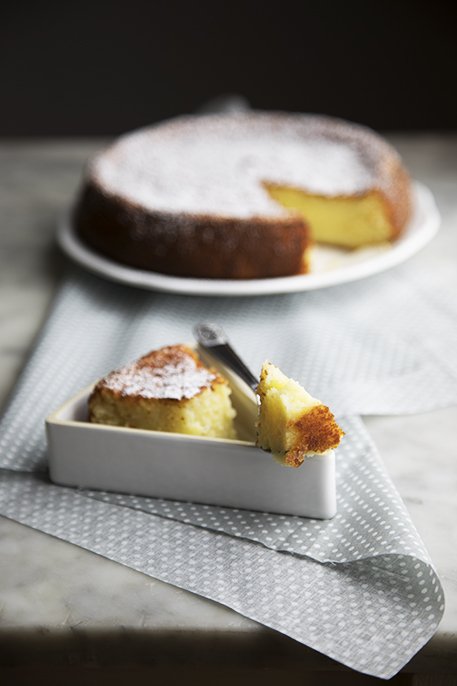
La cottura dovrà durare sui venticinque minuti. Fate la prova stuzzicadenti: in caso esca ancora umido, fate andare per ancora qualche minuto.
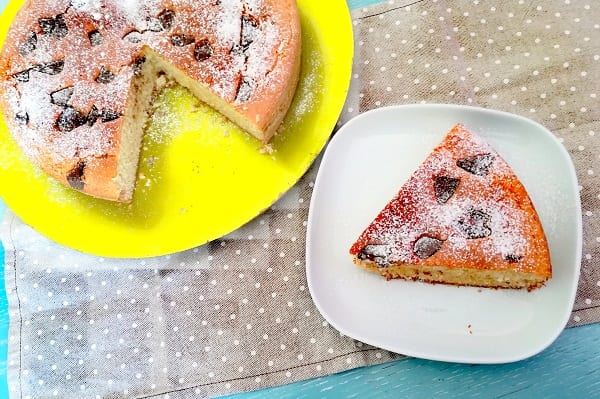
Quando la torta è cotta a puntino, si lascia freddare, si cosparge di zucchero a velo e poi si serve in tavola.
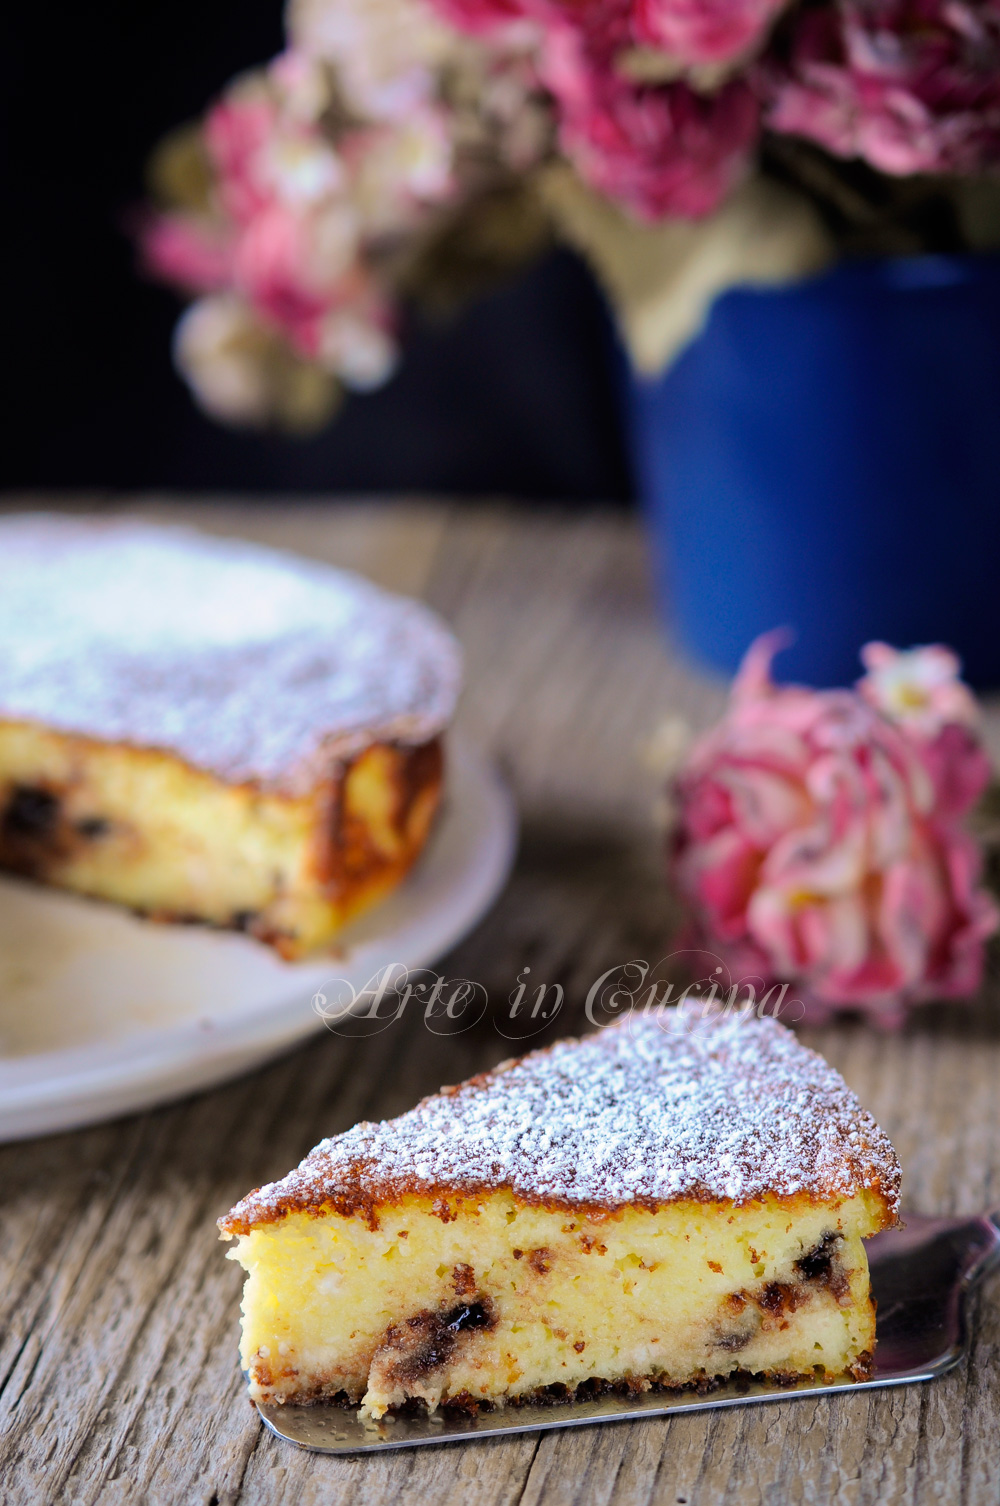
125g di burro 200g di zucchero 3 uova 175g di farina senza glutine 1 presa di sale 250g di ricotta 1 cucchiaino di lievito (baking) 1 cucchiaino di estratto di vaniglia 2 pere sode
PREPARAZIONE
Accendete il forno a 200°.
In una ciotola mettete il burro con lo zucchero e montateli con le fruste elettriche. Aggiungete quindi le uova, una alla volta, incorporandole bene.
Unite poi la farina senza glutine, il sale, la ricotta, il lievito e l’estratto di vaniglia e mescolate.
Nel frattempo grattugiate le pere ed unite anche quelle (senza l’acqua che si forma grattugiandole).
Foderate una teglia a cerniera da 20cm di diametro con carta da forno, versate all’interno l’impasto ed infornate.
Lasciate cuocere la torta per 45 minuti o fino a quando uno stuzzicadenti infilato nel centro della torta uscirà pulito.
Sfornate la torta e lasciatela raffreddare 10 minuti, quindi toglietela dallo stampo per farla raffreddare completamente.
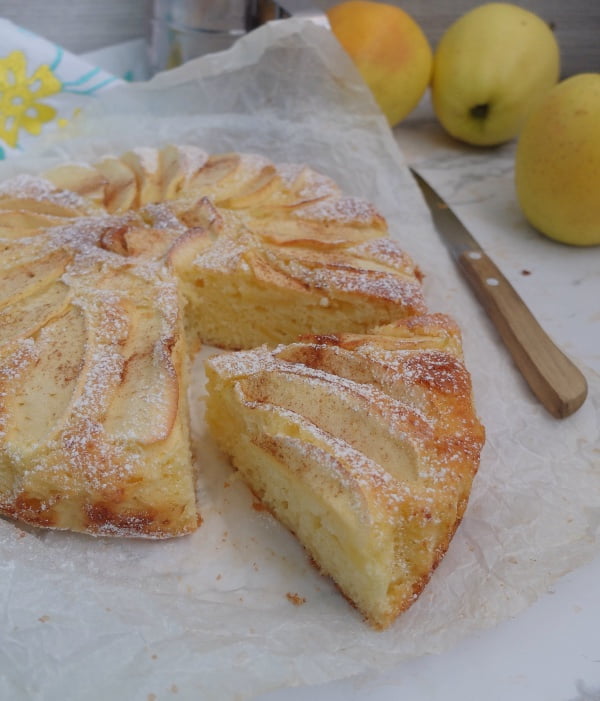
Preparazione: 15 minuti Cottura: 50 minuti Chef: Fornelli senza glutine
Ingredienti
200 gr Mix di farina senza glutine
170 gr Zucchero
250 gr Ricotta
2 Mele grandi
3 Uova
1 Bustina di lievito per dolci
Succo di un limone
Estratto di vaniglia
Istruzioni
Per preparare la torta di mele e ricotta iniziate sbucciando e tagliando una delle due mele in piccoli dadini. L’altra mela, invece, tagliatela a fettine sottili. Irrorate con il succo di limone, per non farle scurire e mettetele da parte. In una ciotola montate, con l’aiuto delle fruste elettriche, lo zucchero con le uova. Quando il composto sarà gonfio e spumoso aggiungete la ricotta e un cucchiaino di estratto di vaniglia o in alternativa una bustina di vanillina e continuate a montare. Successivamente aggiungete la farina e il lievito. Continuare ad amalgamare con la frusta qualche minuto ancora. Ottenuto l’impasto della torta, aggiungete la mela a dadini tagliata in precedenza, con movimenti delicati dall’alto al basso con l’aiuto di una spatola o di un cucchiaio. Versate l’impasto all’interno di una tortiera di 24 cm di diametro, rivestita di carta forno. Disponete sulla superficie della torta le fettine di mele tagliate e infornate a 180 gradi per 50 minuti circa. Prima di sfornare, fate la prova stecchino per assicuravi della buona cottura della torta all’interno. Sfornate la torta di mele e ricotta. Una volta fredda spolverizzatela con zucchero a velo e servitela.
A twist on the traditional gratin, this millet gratin uses roasted cauliflower and cooked millet for a hearty main or vegetarian side dish.
1 medium head of cauliflower
1 medium shallot
2 teaspoons olive oil
sauce
2 tablespoons unsalted butter
2 tablespoons white whole wheat flour or unbleached all purpose flour
1 1/2 cup whole milk
1 1/2 cup shredded havarti (roughly 1/3 pound of cheese)
1/4 teaspoon salt
1 cup cooked millet
1/2 cup shredded parmesan (see note)
Heat oven to 400˚F.
Chop the cauliflower into even, bite-sized pieces and mince the shallot. Place in roasting pan. Drizzle the olive oil and toss until the cauliflower and shallots are well coated. Roast for 25 minutes until the cauliflower starts to brown.
While the cauliflower is roasting, melt the butter in a sauce pan over medium-low heat. Then stir in the flour. Cook for a minute, until the flour is well mixed with the butter. Whisk in the milk and cook until the sauce has thickened enough to coat the back of a wooden spoon. Remove from heat and stir in the shredded havarti and salt.
When the cauliflower is done, add cooked millet to the pan. Then pour the sauce over the mixture. Stir until the gratin is combined. Sprinkle with parmesan and place the gratin back in the oven. Bake for 25 minutes or until the cheese is bubbling and the top is lightly browning.
Tips & Tricks: The key to making a good bechamel sauce is to keep whisking as you add the milk to the butter and flour mixture. Also, whisk constantly while it’s cooking to prevent clumping. Feel free to play with the quantity of milk depending on how thick or thin you want your sauce to be.
")
")
")
")
")
")
")
")
")
")
")
")